Showing posts with label clients. Show all posts
Showing posts with label clients. Show all posts

F E E D B A C K "I am obsessed with our ketubah"
Courtney & Saul's ketubah order was very straight-forward. They opted for the easy, no-fuss route of choosing one of the bespoke designs from my shop - the ORCHIDS.
A quick consult with me on the color options (mockups included!), and the couple chose the Orchids in timeless ivory and silver. They also provided their own Egalitarian text for the ketubah, which I personalized with their details and font choice. A quick proofreading by them and off their ketubah went. Four days later they had it in their hands!
 |  |
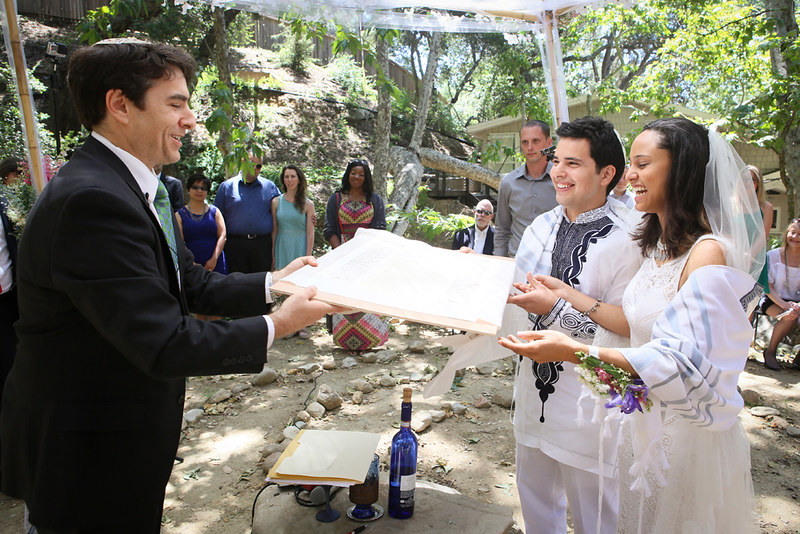
Courtney & Saul's elegant wedding was featured on the wedding blog Smashing the Glass. They read their ketubah aloud to their guests, so this cherished handmade artwork will undoubtedly always evoke those heartfelt memories for them.


--------------------
Photographs by Vivienne Tyler Photography

Stephanie & Lael ordered one of my most popular designs - TWIN CHERRY TREES (available in the shop)- in a warm colorway to feature their carefully composed custom text. It was a fun quick order and the bride was very happy - they loved the design! - until her groom saw the ketubah unveiled and said he didn't like the colors. Cue panic!
To be clear, mistakes are few and far in between, but when they do occur I never take them lightly. If it's my fault I will refund, send a replacement, or cover the costs of returning-fixing-sending the ketubah back in time. There is that grey area on occasions when clients open their gift-wrapped order and tell me they made a mistake on their text or they don't like the colors they've chosen. I always feel guilty for not reading their mind or just knowing better. I am a classic perfectionist and any flaw is a mortal strike - thankfully with this job I rarely get to feel this way.
I really felt for Stephanie and Lael, two weeks before the wedding and they wanted to know if they could change the ketubah's colors all together! I gave them a price and time quote but encouraged them to think it over. They were stressed and emotional and I was convinced they'll like their ketubah as-is once the wedding fog cleared since they loved the design so much. It might sound presumptuous but in these cases I encourage my clients to look at their ketubah in different light conditions and to place it against the walls in their home to better judge how it will really look in its final resting place. It's amazing the difference a good night sleep or two will have, too. In this case, it helped a lot and after much consideration Stephanie and Lael decided to keep their ketubah in the colorway they originally chose. It was the best decision, as these breathtaking photos show (taken by The Spragues). In fact, their wedding was so beautiful I am tempted to share an inappropriate amount of their photos with you! Instead I'll limit myself to those featuring the ketubah, which colors in the end complimented the venue so well.
F E E D B A C K
Thank you SO much for all your patience and help, you've really been exceptional to work with.
S T E P H A N I E & L A E L
 |  |


 |
| photos by The Spragues |
Congratulations Stephanie & Lael!Thank you for choosing the Twin Cherry Trees ketubahfor your celebration and to display in your homefor a lifetime to come

In honor of the new year - Welcome 2018! - I thought I should share with you a day (or so) in my studio, wherein I prepare a ketubah from start to finish. I've made an effort lately to document more of my work day, which involves imploring visitors to take a picture or setting up a finicky tripod with a delay trigger... My gosh, I sound technically challenged. But my work is solitary, so them's the breaks. The photos are from different orders but together they give a complete picture of the process. Follow me on the journey to make the bestseller MOON & FLOWERS ketubah.
In this current studio setup I have two work stations: a tall chest of paper drawers and a long sit/stand workbench. For those of you who are interested (I know I always am!) the drawers are not store-bought. I had them made to my specific design by a local carpenter after I was obsessed with vintage flat file/map cabinets for over a year. I was stalking furniture sites and kept a photo folder on my desktop, that's how obsessed I was. There's a great saga about how these drawers came to be and moved several studios with me (they even have a war wound or two to show for it), but probably only interesting to me and my family. You don't have a full view of the desk here (which lowers and raises with the use of a crank) but it is also handmade, a DIY masterpiece by my talented sister.
Back to the art: I start every order at my papers station. I have a favorite paper I use and I have it cut and stored in full sheet-half sheet-quarter sheet. I used to stock only Fabriano Accademia, but after a bad experience with my last order (read more here) I changed to Canson stock. Like anyone I have my habits and favorites and sadly it took a big shakeup to have me try new papers, but I started out papercutting by trying many different paper mills, collections, and weights until I found the one most suited to me - and I encourage all new papercutters to do the same. My paper drawers are filled with different papers, most I still use today for different papercuts.
Once I have my paper cut to size and fitted over the design template, I move over to my workbench because that's where my iMac sits and I can't work in silence. I sit (or stand - the table rises!) and papercut while watching movies or listening to audiobooks. (I need more audiobooks.) I wrote about my YouTube work playlist here, if you want to go down that particular internet rabbit hole.

Once tracing is done I move on to cutting. Looking at all the photos now the progression of time is very obvious. I started in a bright sun-filled room and worked through to the next morning. Cutting at night is like sleeping sometimes, because you get in a trance and your mind rests. I find I'm much more ...productive, when it's the dead of night and only I and the wild foxes howling outside are awake. This is a classic case of do as I say not as I do though, you should definitely manage your time better than I do mine and go to sleep.

 The two most important accessories for a papercutter are a good self-healing mat and a bright lamp. I still haven't found my perfect cutting mat (there seems to be only one brand stocked in the entirety of Israel), but I use what I have until they're in tatters, flipping them upside down and reverse side up until all surfaces are roughed up. Honestly, I almost don't want to throw them away when I'm done with them because they're like memory-catchers to me. They last for years each, so they do good.
I don't remember why I first thought of getting a magnifying lamp - I think I got the idea after seeing magnifying glasses in a cross-stitching magazine - but it has truly filled a need I didn't even know I had until I first used the lamp. For those interested, the lamp is mounted to the desk like an architect lamp but also has a mobile stand you can purchase separately. You an find these lamps at professional beauty supply stores, they're for beauticians. I've had mine for 6 years now I believe and it gives the perfect light, it doesn't heat up, and the magnifying glass has saved my eyesight.
 As you can see I like to marathon my papercutting. I measure the passage of time by what's playing on the iMac. (I think I played all four Lethal Weapon movies when I cut this one.) Every papercutter has a method to their madness, where they start cutting and how they continue until it's done. I think photos of the papercut "emerging" from the blankness of the paper are the most beautiful on my instagram feed. I've said it before and I'll say it again, to me seeing any art in progress is like watching magic unfold. I always start by cutting the straight lines all around the border, then I pick a bottom corner and work my way around.
With nearly all my ketubot I make the text a separate layer from the design. I used to insist on cutting the ketubah from a single layer and that's how I started, but once I introduced color to my options I found that separate layers add interest while also streamlining the process (no need to wait for the clients to approve the text before cutting, no panic when they want to change the text after I already cut the ketubah). The Moon & Flowers ketubah has a unique text layer that needs to be papercut as well, which is an interesting challenge every time. For the order pictured below the clients selected a light-color-paper for the text layer, so I used the lightpad to make sure I didn't overlap the text and kept it levelled and centered when I drew the moon on the reverse. After cutting I centered the moon in the layout and marked where the two layers overlapped and I needed to cut the excess. At 3AM the glow was mesmerizing.

By morning this incarnation of the Moon & Flowers ketubah came together: Paired with hand-painted silver background, this pale beauty shone bright with a tranquil air about it. In contrast, the next papercut incarnation pictured below has a deeper color scheme giving it a 'moodier' vibe. Which would you choose?


 I'm actually surprised by how much a papercut changes with the colors the clients choose. That's why I love what I do - every ketubah is a reflection of the couple who commission it, and the bespoke nature of the handmade makes every order personal and unique. Take for example this vibrant incarnation I made for Sam & Jason that was customized with the couple's wedding crest. The photos of it are some of my favorite I took last year!


 After I photograph my work, I wrap each order with care in my signature packaging. My packaging is simple in concept - I chose it foremost for its durability - but I take care to wrap each papercut so it feels like opening a gift, in honor of the art treasured inside. Each papercut is placed between two branded wood boards, secured with special Italian ribbon, and topped off with a personalized note. From when the ketubah is packed up and waiting for pickup until it arrives safely to its owners I am anxious, so there's nothing better than getting back feedback and beautiful photos of it in use!


Back to the art: I start every order at my papers station. I have a favorite paper I use and I have it cut and stored in full sheet-half sheet-quarter sheet. I used to stock only Fabriano Accademia, but after a bad experience with my last order (read more here) I changed to Canson stock. Like anyone I have my habits and favorites and sadly it took a big shakeup to have me try new papers, but I started out papercutting by trying many different paper mills, collections, and weights until I found the one most suited to me - and I encourage all new papercutters to do the same. My paper drawers are filled with different papers, most I still use today for different papercuts.
Once I have my paper cut to size and fitted over the design template, I move over to my workbench because that's where my iMac sits and I can't work in silence. I sit (or stand - the table rises!) and papercut while watching movies or listening to audiobooks. (I need more audiobooks.) I wrote about my YouTube work playlist here, if you want to go down that particular internet rabbit hole.
When I started I used to trace my designs onto paper on a window or using wonky light box a janitor at uni DIY'd for me. Both options got really hot, it was always a painful position, and I kinda miss it, but I've since invested in gorgeous light pads that are like magic (read more about my tools here). Tracing takes several hours because I'm slow like that. Wondering how slow I go? check out the video above.
|  |
 The two most important accessories for a papercutter are a good self-healing mat and a bright lamp. I still haven't found my perfect cutting mat (there seems to be only one brand stocked in the entirety of Israel), but I use what I have until they're in tatters, flipping them upside down and reverse side up until all surfaces are roughed up. Honestly, I almost don't want to throw them away when I'm done with them because they're like memory-catchers to me. They last for years each, so they do good.
I don't remember why I first thought of getting a magnifying lamp - I think I got the idea after seeing magnifying glasses in a cross-stitching magazine - but it has truly filled a need I didn't even know I had until I first used the lamp. For those interested, the lamp is mounted to the desk like an architect lamp but also has a mobile stand you can purchase separately. You an find these lamps at professional beauty supply stores, they're for beauticians. I've had mine for 6 years now I believe and it gives the perfect light, it doesn't heat up, and the magnifying glass has saved my eyesight.
 As you can see I like to marathon my papercutting. I measure the passage of time by what's playing on the iMac. (I think I played all four Lethal Weapon movies when I cut this one.) Every papercutter has a method to their madness, where they start cutting and how they continue until it's done. I think photos of the papercut "emerging" from the blankness of the paper are the most beautiful on my instagram feed. I've said it before and I'll say it again, to me seeing any art in progress is like watching magic unfold. I always start by cutting the straight lines all around the border, then I pick a bottom corner and work my way around.
 With nearly all my ketubot I make the text a separate layer from the design. I used to insist on cutting the ketubah from a single layer and that's how I started, but once I introduced color to my options I found that separate layers add interest while also streamlining the process (no need to wait for the clients to approve the text before cutting, no panic when they want to change the text after I already cut the ketubah). The Moon & Flowers ketubah has a unique text layer that needs to be papercut as well, which is an interesting challenge every time. For the order pictured below the clients selected a light-color-paper for the text layer, so I used the lightpad to make sure I didn't overlap the text and kept it levelled and centered when I drew the moon on the reverse. After cutting I centered the moon in the layout and marked where the two layers overlapped and I needed to cut the excess. At 3AM the glow was mesmerizing.
By morning this incarnation of the Moon & Flowers ketubah came together: Paired with hand-painted silver background, this pale beauty shone bright with a tranquil air about it. In contrast, the next papercut incarnation pictured below has a deeper color scheme giving it a 'moodier' vibe. Which would you choose?
-------------------- F E E D B A C K --------------------
We were so proud to sign it and show it off to our guests under the chuppah! We adored working with you and can’t wait to hang it up in our home! Thanks again for playing a big role in making our wedding memories so special!
-------------------- S A M & J A S O N --------------------
 |  |
 |
| photos by A Nomadic Love |

 I make papercuts for all weddings, as luckily Jewish people aren't the only ones who thought of presenting their vows to their community in artful detail - take the QUAKERS for example. They take it a step further even and involve their community by having everyone sign their hand as witnesses to the union - making the ketubah pull double duty as both a troth keeper and a guestbook!
There are different styles and ways to go about writing a Quaker certificate. Traditionally the text is short and written by the community of witnesses (it is most comparable to the Jewish ketubah's Egalitarian text). The more modern texts range from the bride and groom's vows followed by their signatures and their guests' signatures, to a succinct sentence declaring all the signatories witnesses to the union followed by the signature lines (read the text options I offer HERE).
I like the approach that combines the couple's vows with space for all the wedding's guests because it has something for everyone. And I truly mean everyone, because like the Jewish ketubah, the Quaker certificate has been adopted and adapted by couples of all faiths and persuasions for their weddings, as seen below.

It's hard to find unique, beautiful Judaica, and Naomi's work was so imaginative and skillful that we couldn't imagine having anything else for our ketubah. The process of working with Naomi was an absolute pleasure. Despite the distance, she responded quickly to every email. She was incredibly professional and personable as we collaborated on a custom ketubah. Naomi made creating the ketubah a joy. Our ketubah is something that we'll cherish forever and we have her to thank for it.
~ Lily & Gary Stute
(see their featured post here)

Wow absolutely stunning workmanship! Even the way it came packaged is of very high quality. Everything is top notch and worth every penny. Naomi of Woodland was an absolute pleasure to work with from the start and took the time to answer any questions I had. Her work is simply gorgeous and I would highly recommend Woodland Papercuts!
~ Dana-Maxx & Brandon Goodman
(see their featured post here)
I literally can not express my excitement! I can't wait to see everyone's faces when they see this, the design far exceeded my expectations, and I was really confident it was going to be amazing, so the fact that its better than I could imagine makes me so thrilled! I am so glad we found your designs! The ketubah is so beautiful, looks amazing in our house, and just perfectly fits us! By far our ketubah will be one of the best, physical mementos from our wedding!
~ Erin & Dylan Murphy
(see their featured post here)


We both started tearing up when we unwrapped it. I could rave about your work for days. The ketubah you made for us is truly an heirloom for a lifetime, and as the dust settles it becomes even more clear what was worth it. Did we really need linen napkins? Would we have been fine without the extra favors? Hindsight is always 20/20 and the ketubah shines through as a constant source of joy. Thank you.


Your Ketubah was a source of amazement during our wedding!
~ Jenifer & Jeff Gould
1st photo | Jenna & Evan by Jackie Bayne, Love Shack Photography
2nd photo | Dana-Maxx & Brandon by Max Grudzinski, Iluminada Photography
3rd photo | Jenifer & Ianiv by Jennifer McMenamin Photography
4th photo| Molly & Win by Tristan Crane Photography
5th photo | Danielle & Jared by Unknown
____________________

____________________ F E E D B A C K ____________________
We requested a custom papercut, but we had very little idea of what we wanted to see. I was so amazed with your artistic ability to convert the information we provided about us as people to a magnificent piece of art that truly represents us as a couple. The ketubah is a perfect depiction, displaying the area we live and fell in love as well as included a lot of personal touches!
The kids spent the night looking for all the fun critters in the design, they thought it was a huge seek and find, which was adorable! The guests as a whole really enjoyed the hidden treasures buried in the design as well as just how elegant and unique it was.
I can't stress enough how well you nailed us and the look down! I know you had to have done a decent amount of research on the elements we provided you, which just really shows how much you love your job and your craft, as well as your customers!
I really am in awe of how from across the world you can nail down the personality and culture we were looking to portray. There is no doubt this is my favorite piece of art in our home. I want to just keep raving about how awesome it was to work with you, and how happy we are with the results!
The kids spent the night looking for all the fun critters in the design, they thought it was a huge seek and find, which was adorable! The guests as a whole really enjoyed the hidden treasures buried in the design as well as just how elegant and unique it was.
I can't stress enough how well you nailed us and the look down! I know you had to have done a decent amount of research on the elements we provided you, which just really shows how much you love your job and your craft, as well as your customers!
I really am in awe of how from across the world you can nail down the personality and culture we were looking to portray. There is no doubt this is my favorite piece of art in our home. I want to just keep raving about how awesome it was to work with you, and how happy we are with the results!
________________________________________________________

______________________________________________
Congratulations Erin & Dylan Murphy!
Thank you for choosing my ketubah for your celebration
and to display in your home for a lifetime to come
______________________________________________

We ended up enlarging the ketubah to 24 inches long to accommodate the text Aaron provided; a traditional Conservative Mizarachi text, which reads more poetic than the Ashkenazi version.
previous post
ON TRADITIONAL TEXTS |

______________________________________________
Congratulations Aaron & Jenni Breceda!
Thank you for choosing my ketubah for your celebration
and to display in your home for a lifetime to come
______________________________________________

WONDERS OF SEA & TREE
18X18 inches big
(click photo for best resolution)
______________________________________________
After sharing the custom ketubah WONDERS OF THE WOOD & SEA earlier this year, I decided to make a version of it available in the shop for all! This version has all the charm of the original, with fewer critters.
Chock full of shells and sea monsters of old, you can really get lost in the papercut. It's one of those designs that just keeps on giving, from the first 'oh, Wow!' gasp to the search for all the creatures nestled in the flowers and waves. I like to think this ketubah would be perfect for a sea-loving land-bound couple.


______________________________________________
Molly and her fiancé (who has one of the coolest names I ever heard) Win Wallace, chose it for their wedding back in October. They opted for a moody shimmer copper & midnight blue pairing, which you'll agree suits this design just fine!


____________________ F E E D B A C K ____________________
Naomi was a pleasure to work with every step of the way. She worked with us to select a design that worked for us, and translated our text. When you're in the thick of it, everything from the shoes to the invitation font can seem like the highest priority, but when the dust settles it's easy to see what was really worth it. The ketubah shines through as an heirloom we will treasure for the rest of our lives.
____________________Wedding photos by Tristan Crane Photography

____________________ F E E D B A C K ____________________
Wow absolutely stunning workmanship! Even the way it came packaged is of very high quality. Everything is top notch and worth every penny. Naomi of Woodland was an absolute pleasure to work with from the start and took the time to answer any questions I had. Her work is simply gorgeous and I would highly recommend Woodland Papercuts!
________________________________________________________
 Dana-Maxx and Brandon were married earlier this year. For their wedding they selected a new ketubah in my shop called

______________________________________________
13X19 inches big | personalized monogram
______________________________________________
This design features stylistic waves and lilies, and packs quite a statement for its size!
We went through several color ways, and they ended up with the classic ivory & gold. All the better for this classic couple! When I received the photos back, I could not believe how well the ketubah suited them! Dana-Maxx looks like classic glamour personified - anyone else think of Dita von Teese? - and their photographer took the best pictures I've seen of my ketubot yet (thank you, Max)!


Wedding photos | Max Grudzinski, Iluminada Photography
Subscribe to:
Posts (Atom)


Social Icons